
Growing up, the only gardener I knew who started plants from seed was my grandma. So when I decided to try seed starting myself as an adult, I had little to no experience. Unlike other parts of gardening that felt familiar, this was uncharted territory. I started with peppers and tomatoes, placing them in a sunny, south-facing window. Waiting for those first seeds to germinate felt like an eternity, but when I finally saw those tiny green shoots, I was overjoyed.
By May, I may have gotten a little impatient and ignored my mom’s advice to take it slow with hardening off… I lost some plants along the way, but the ones that survived were cherished. From that first season on, I was hooked.
This beginner-friendly guide will walk you through the basics of starting seeds indoors—whether you’re using grow lights or just a sunny window. If this is your first time seed starting, and you’re ready to dive in, this post is for you!
This post contains affiliate links, meaning that if you purchase something by clicking one of these links, I earn a small commission at no extra cost to you. You can read more about it here in my Privacy Policy.
The Difference Between Seed Starting and Direct Sowing
When it comes to growing plants from seed, you have two main options: starting seeds indoors or direct sowing them outdoors.
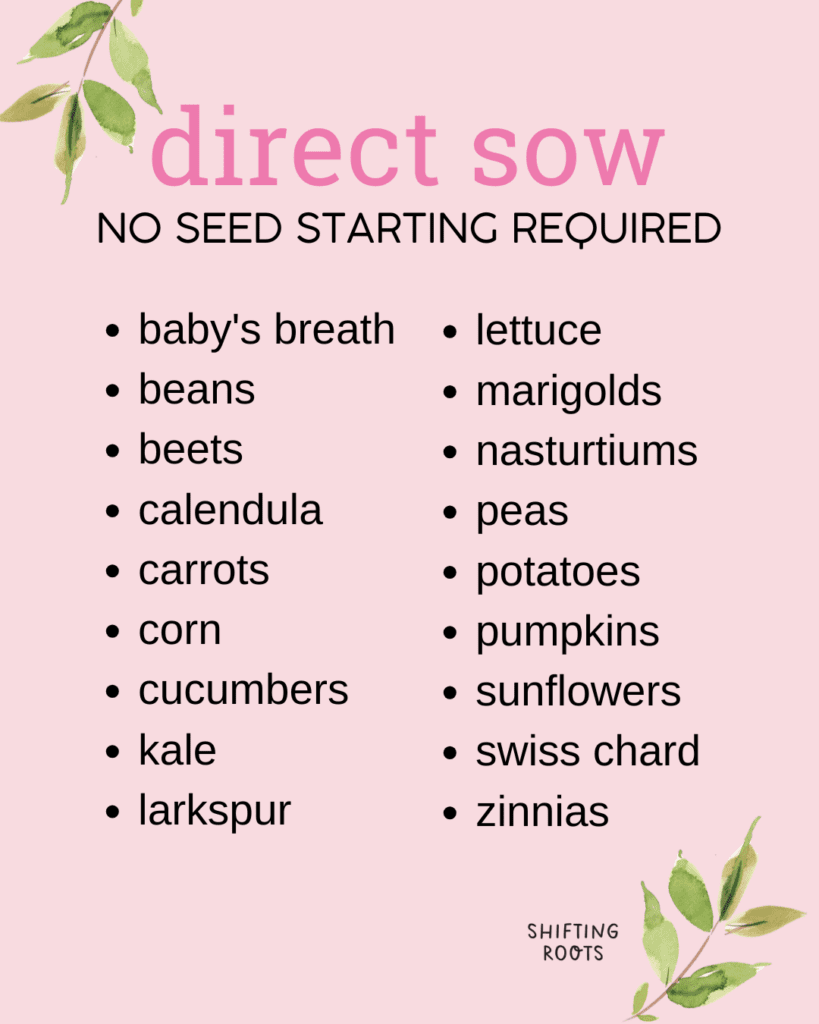
Some plants thrive when started indoors, especially slow-growers like tomatoes and peppers. Starting them indoors in a cold climate helps them get a jump on the season before they’re ready to move outside. Other plants, like carrots, radishes, and beets, prefer to be direct sown, either because they don’t like being moved or they’re quick to mature. Plants like broccoli, cauliflower, zinnias, and marigolds are more flexible and can be started indoors or direct-sown—whatever fits your schedule!
The list below includes plants that don’t require seed starting. If you’re wondering which seeds to start indoors, be sure to grab my free seed-starting schedule for week-by-week lists to ensure you’re starting your seeds on time!
How to Plant a Seed Step-by-Step
1. Pick your seeds
Start by choosing what you’d like to grow. We have lots of helpful posts on the blog for beginner-friendly veggies, cut flowers, and perennials. Most grocery stores and big box stores (and sometimes even local small businesses) will have seed packets from mid-February to June. If you’d rather shop online, check out this post!
2. Designate an area of your house
You can set up your seed starting area wherever works for you. If you’re using grow lights, just make sure not to overload one breaker (trust me, I learned the hard way!). I have grow lights set up in multiple spots around my house. If you want some suggestions for my favourite grow lights, check out this post!
If you’re using a window, choose a south-facing one for the best light. East and west-facing windows can work too, but avoid north-facing windows. No matter the temperature outside, keep your setup as close to the window as possible!
3. Choose a soil
I recommend using a basic seed-starting mix or potting soil. There is no need to use a custom mix when you are just starting out unless you really want to! However, I do recommend sprinkling vermiculite on top of your seed starting trays, just so you don’t get mould and algae on top of your soil as easily.
For everything you need in your seed-starting setup, check out this post!
4. Plant the seed
Place the seed in the soil. Really, that’s it! For most seeds (except large ones like cucumbers or pumpkins), I just lay the seeds on top of the soil and cover them with vermiculite. I don’t press them in or do anything fancy.
5. Water gently
If you’re using trays with cells, bottom-water your seeds. If you’ve scattered them on the soil and plan to transplant themlater, gently mist with a sprayer. You can see this in action and learn more about bumping up seedlings in the video below:
6. Provide light and warmth
Make sure the room you’re seed starting in isn’t colder than 18°C (64°F). If it is, consider using a space heater. You can also use seedling heat mats, but I personally avoid them because they dry out my seedlings (I’m a stingy waterer!).
7. Be patient
Most plants germinate in 7-21 days, but be sure to check your seed packet for the expected germination time. If you don’t see any green after 21 days, you have my full permission to give up on your seeds!
8. Keep moist, and watch it grow!
If you’re using grow lights, they should ideally be on for 16 hours a day (though they can be on for as little as 12 and as often as 24). Make sure to keep the lights close to your plants unless they’re professional SunBlasters. If they are cheaper lights, about 2 inches above is good.
If your seedlings look very stretched out and spindly, they don’t have enough light. You either need to add an additional grow light or to bring the lights down closer to your seedlings. If you’re seed starting in a window, make sure to turn your seedlings every day or two to keep them from leaning toward the sun!
A Note on Window Seed Starting vs Grow Light Seed Starting
You can combine any of the methods below with window seed starting or traditional grow light seed starting. Window seed starting is cost-effective and energy-efficient because it doesn’t require a lot of supplies. On the other hand, grow lights offer more consistent light and warmth, plus they provide more flexibility in terms of space since they don’t depend on specific window orientations.
Learn more about grow lights here: The Best Grow Lights for Seedlings (From Budget to Bougie)
Learn more about seed starting from a window here: DIY Seed Starting From Your Window
Different Seed-Starting Methods
The best method for seed starting is the method that works best for you! Here are some of my favourites:
Soil Blocking
Soil blocking involves using a soil blocker to pack a soil mixture into blocks, which are then used to plant seeds. This method eliminates the need for seed-starting pots and trays, but there is a learning curve with making the soil blocks and learning how to water them so they don’t fall apart. A good soil mix helps ensure the blocks hold together and provides the proper nutrients for seed growth.
Soil blocking promotes healthier roots, reduces transplant shock, saves money, and reduces plastic use. This is a method I grow fonder and fonder of with every year I seed start.
Related: The Soil Block Recipe That Actually Holds Together
Winter Sowing
Winter sowing involves starting seeds in milk jugs outdoors, which act as mini greenhouses. Cut the jug, fill it with potting soil, add seeds, water, and tape it back together. Label each jug and place them outside in a sunny spot. Check after a couple of weeks to ensure moisture and temperature are ideal.
Winter sowing saves space, doesn’t require grow lights, and works well for cold-hardy plants like kale and lettuce. It’s inexpensive, simple, and perfect for small spaces or cold climates like Zone 3, though this doesn’t work with all plants.
Related: How to Start Seeds When Your Home Has No Light or Space
Jiffy Pods
If you’re an unconfident beginner, I’d recommend starting with Jiffy pods. They’re the most foolproof method, in my opinion, but their cost can add up if you’re scaling up your garden. Once the roots grow through the pod, transplant the seedlings into a larger container with more soil. You can reuse the plastic parts by refilling them with fresh pods each season.
These pods are great for small spaces like windowsills, support healthy root growth and are both eco-friendly and cost-effective.
Newsprint Pots
Newsprint pots are a bit more time-intensive, but they’re good for the environment, cost-effective, and good for any plants that don’t want their roots disturbed. I always use these for my Iceland poppies and my pumpkins.
To make compostable newsprint pots, cut newspaper into strips, roll them around a mold (such as a jar or cup), and fold the bottom to form a pot. Fill with potting soil and plant your seeds. These pots can be placed in a waterproof container to water from the bottom.
Related: Compostable Newsprint Seed Starting Pots
Seeding Snail
I’ve only tried the seeding snail once, but it is such a cool method that I had to include it. Learn more in the video below!
My Favourite Seed Starting Products to Make Things Easier
H-Start
This amendment is Saskatchewan-made and new to me this gardening season. I am already seeing a huge difference in my seedlings! Check out my results so far in the short below.
Seed Starting Fertilizer
When shopping for a seed-starting fertilizer, look for the NPK number 10-52-5. For more about the different kinds of fertilizer and when and how to fertilize seedlings, check out this post!
Wool Pellets
I use wool pellets in my soil blocks and really like them. I’ve used both Canadian wool pellets and Leystone Farms wool pellets and have had success with both.
Worm Castings
Another essential ingredient in my soil-blocking recipe!
Vermiculite
As I mentioned earlier, I always sprinkle vermiculite on top of my seedlings to reduce the growth of algae and mold. Adding vermiculite to your potting mix also improves soil aeration and moisture retention, benefiting plant growth. I also recommend vermiculite for storing dahlia tubers and gladiolus corms during winter, as it helps maintain proper moisture levels and protects the bulbs from rot.
Sturdy Seed Starting Trays
As my plastic trays wear out, I am switching over to even sturdier plastic trays. You’ll need both a base tray and a seedling tray (these deep ones are especially good for soil blocking!). I especially love the options from Bootstrap Farmer because they are extra sturdy and come in a bunch of fun colours!

For more about seed starting, browse my other seed-starting content on the blog here!
If you liked this blog post, find me on Facebook, TikTok, and Instagram for more cold-climate vegetable gardening tips, delicious recipes, and cut flower goodness! I also make weekly videos over on my YouTube channel. I hope to see you there!
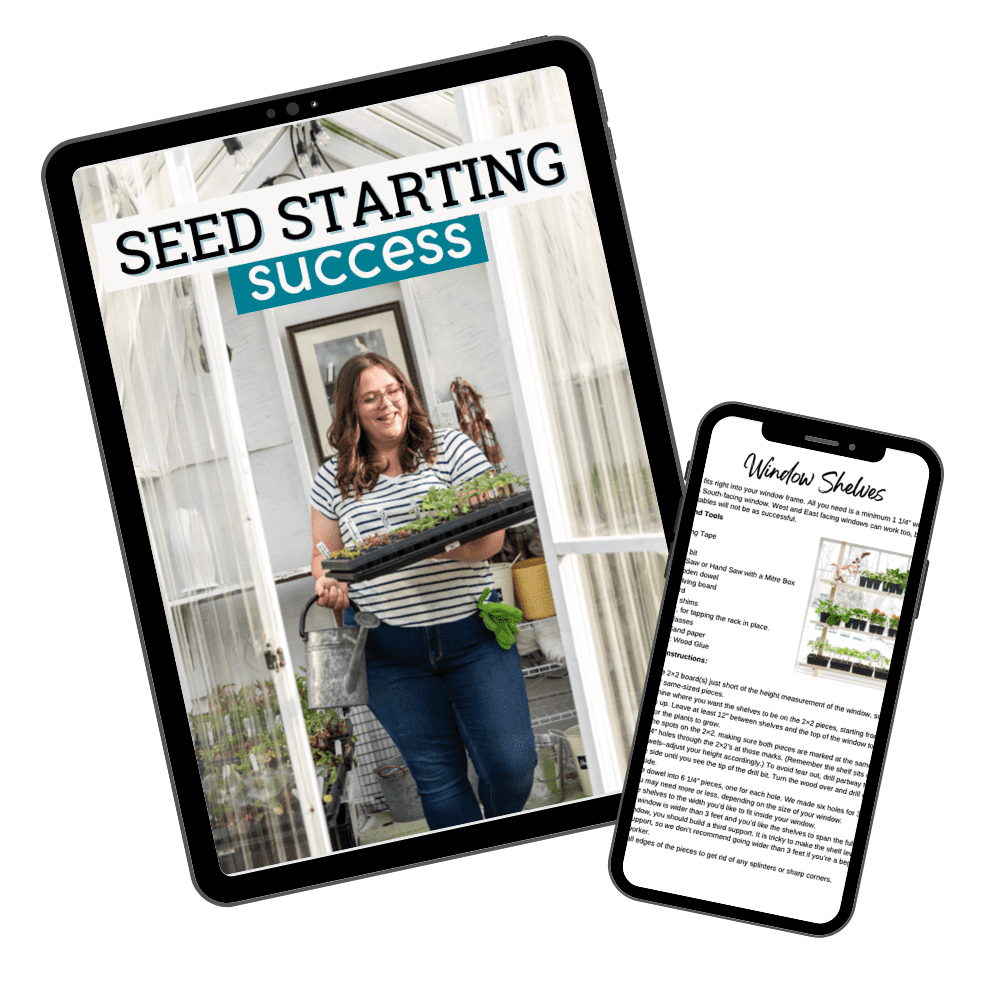
HAVE YOU TRIED SEED STARTING, ONLY TO BE LEFT WITH STRETCHED-OUT SEEDLINGS AND DEAD PLANTS?
You’re not a bad gardener–you just need a little know-how. For the price of a few seed packets, you can stop wasting time and money and start growing seedlings that actually live, and you get to harvest. Don’t miss out on another growing season. Get your copy of Seed Starting Success now (videos included)!


Join the conversation