
In 2020, I decided to grow one of the most challenging vegetables to start from seed, especially in a northern climate like where I live in Zone 3: the luffa sponge.
From what I can tell from my research, it’s pretty challenging to grow in any zone from 6 and lower. But I had dreams of growing luffa sponges for both the bragging rights and as a non-plastic dish sponge and exfoliator, so the challenge was on.
But before I go on about the strategies to grow a successful luffa plant in a cold climate, I’ll warn you—this is a long post. But if you read to the end, you’ll see how many lessons I learned the hard way so you don’t have to!
What is a luffa and what do you do with it?
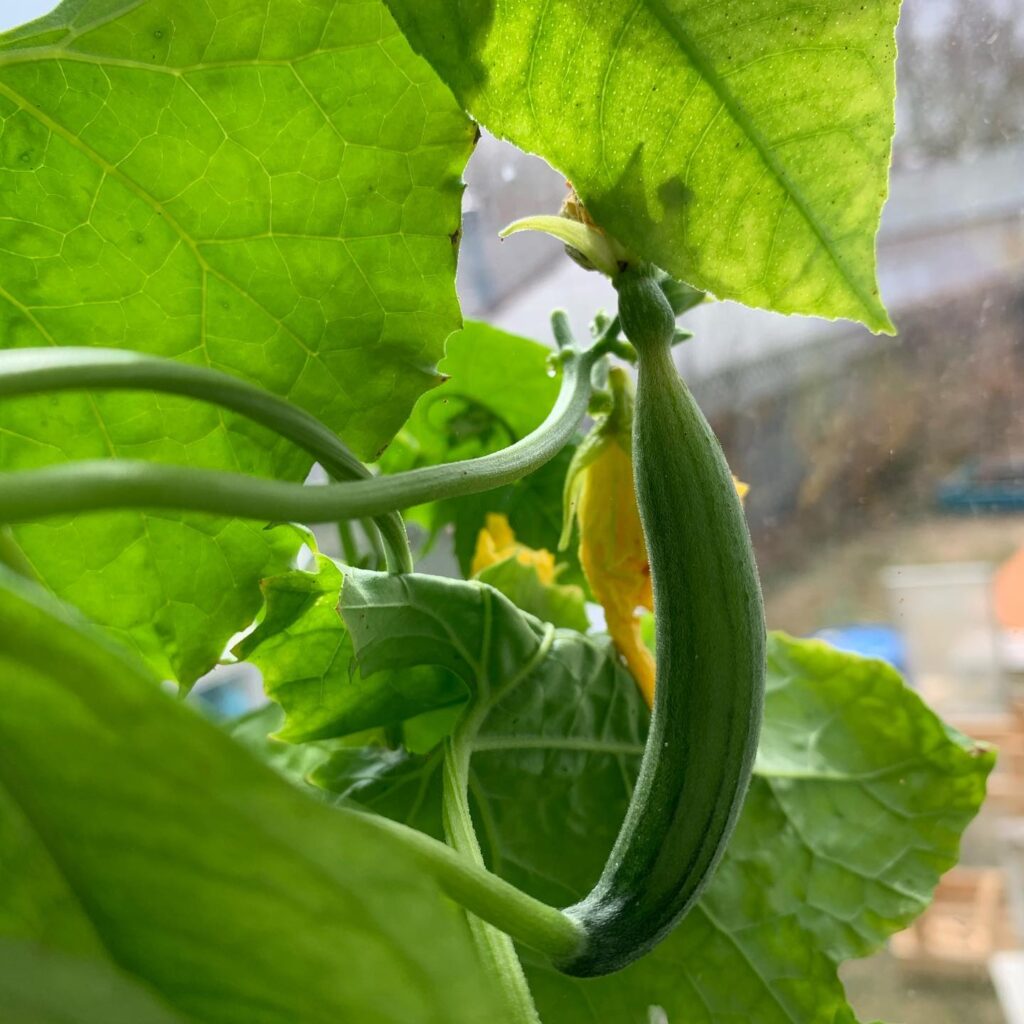
A luffa sponge (also spelled loofah, loofa, loufa, and probably another billion ways) is a vining plant that initially looks like a zucchini (and can be eaten like one when it’s young), which hardens into a fibrous sponge. It can be used as a gentle and natural scrubber for cleaning your dishes or marks on your walls, or as an exfoliating sponge for your skin, as-is or with soap.
Contrary to popular thought, luffas actually have nothing to do with the sea or sea creatures.
Growing luffa sponges is extremely attractive for those living a zero-waste lifestyle, or even if you’re just looking to cut down your plastic consumption.
With that out of the way, let’s talk about the challenges…
P.S. If you’d rather watch your content than read about it, check out my video on growing luffa sponges below:
The Challenges of Growing Luff Sponges in a Cold Climate & How You Can Succeed!
The first challenge is that the luffa plant needs 200 days to mature. 200 days! When your whole growing season is 90-110 days, this presents a massive problem.
Second, the luffa is a giant baby that doesn’t like the cold. Sure, you can baby it indoors, but if it goes outdoors in anything colder than 10 degrees Celsius, it stops growing for up to a month! What kind of jerk plant does that!?
To make matters worse, once the temperatures start dipping again, the sponge will be ruined if it gets just a touch of frost. There are no taking chances, and no covering your luffa and hoping for the best. One tiny bit of frost and it’s toast.
To sum things up: Long growing season + Unreasonable cold intolerance = Ridiculously challenging plant.
But I’m a sucker for punishment and gardening glory, so here’s what I did…
How to Grow a Luffa Sponge in a Cold Climate
1. Start your seeds in January
This will vary depending on your first frost date, but you must count back 200 days from whatever that is. For me, in Saskatoon, Saskatchewan, Canada, that puts my optimal seed starting time at the last week of January or the first week of February.
My seed packet said to start six weeks before my last frost date, but I ended up starting more like 12, and I’m very glad I did. If you live in Zones 2, 3, or 4, do not listen to the seed packet or other articles that say to start your seeds 6-8 weeks before the last frost. Our temperatures don’t get warm enough at night soon enough and long enough for the luffa vine to flourish as it does in other places.
The luffa plant can take a while to germinate and has notoriously low germination rates. Out of 25 seeds, only 16 germinated for me.
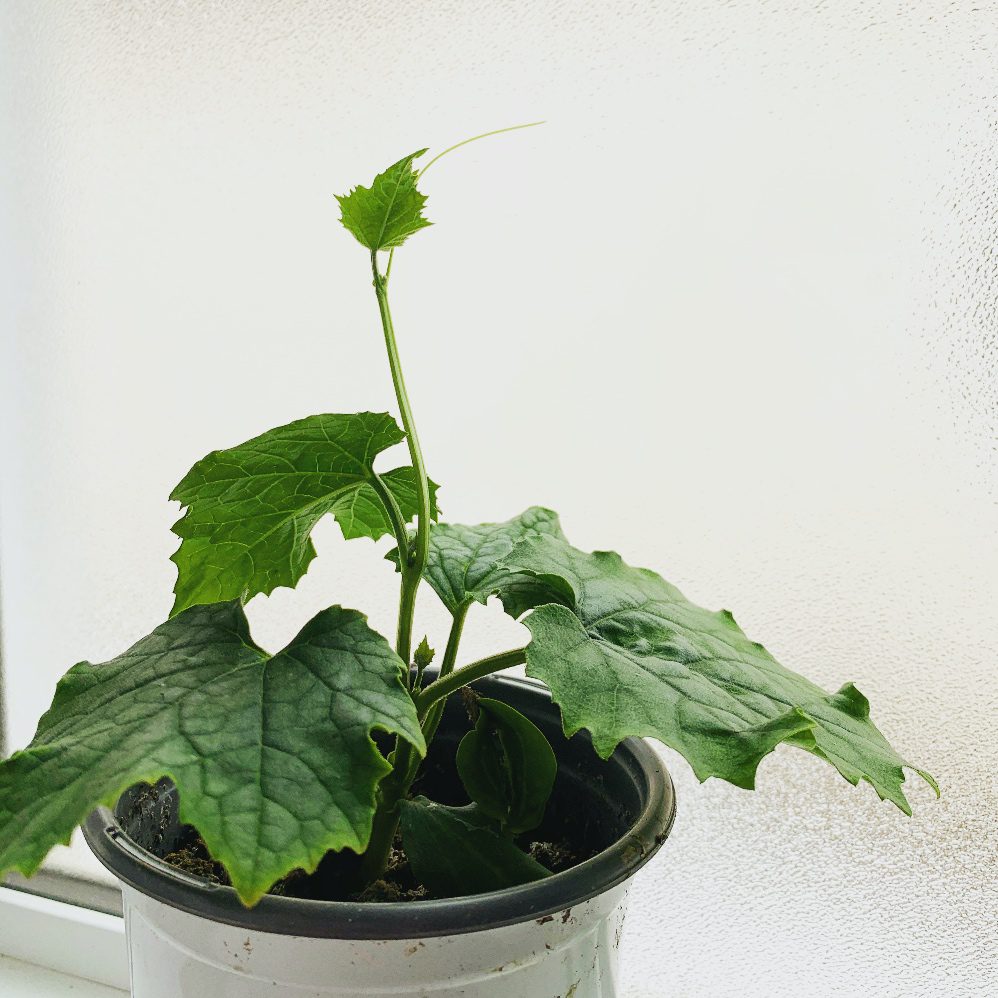
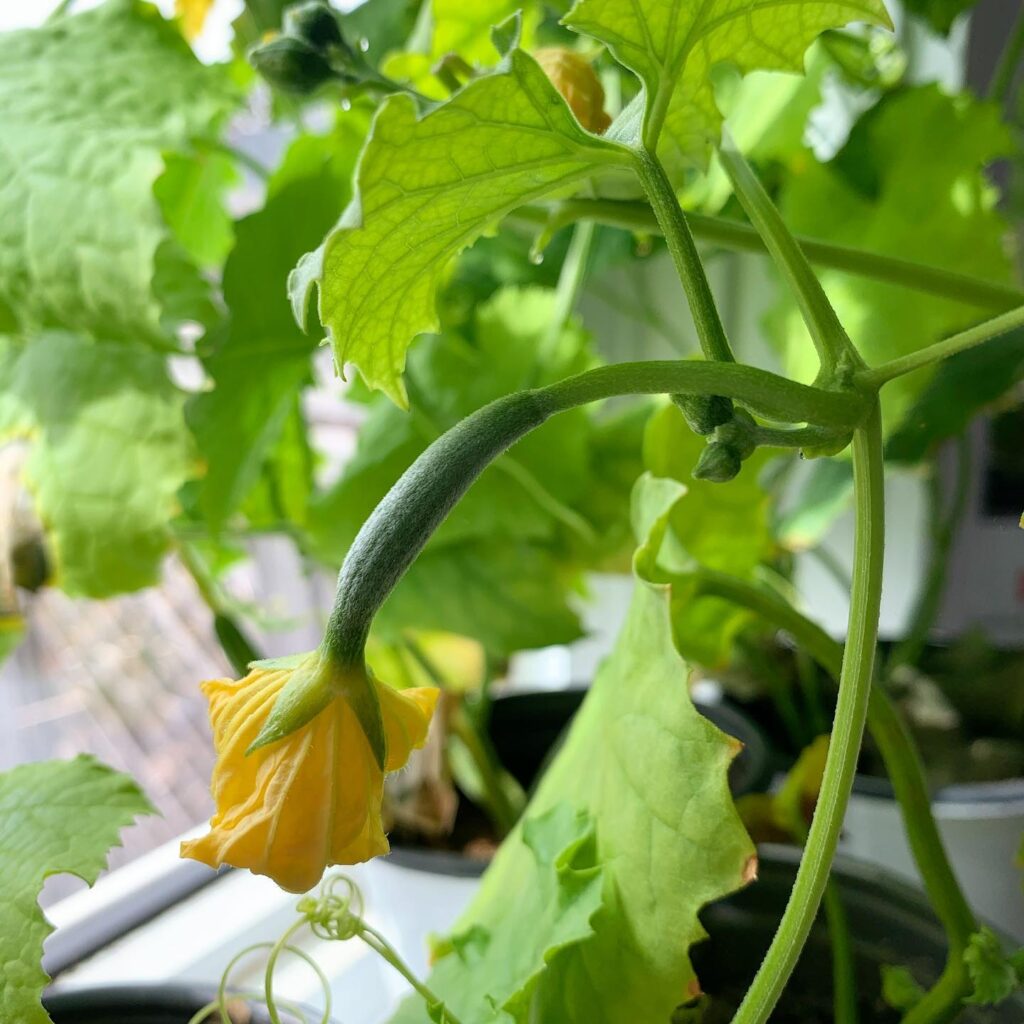
I didn’t use a heating pad to speed things up, but I think it would be a good idea. When the luffa plant opens, it resembles a squash plant and looks like this:
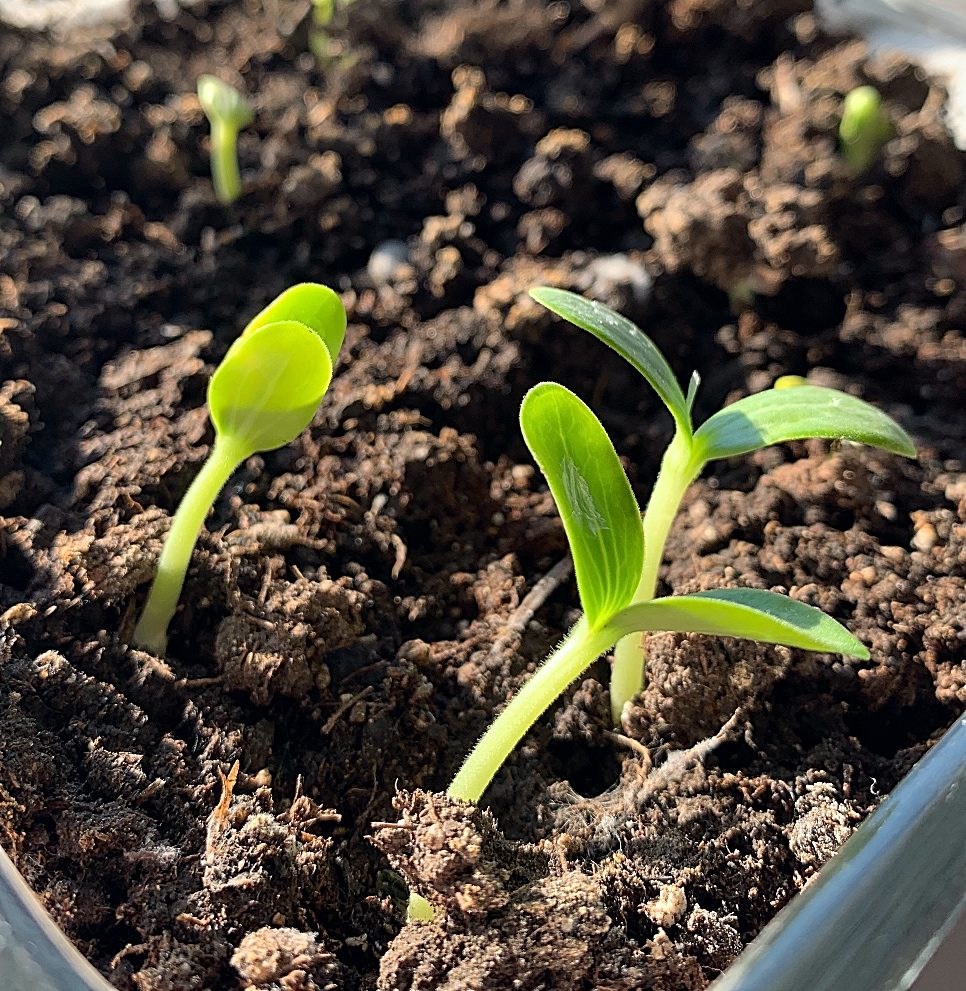
Luffa sponges don’t like to be moved or transplanted, so you have to either plant them in a soil block, newsprint pot, or a very large pot 18-24 inches across (probably not practical for our growing situation).
This is the first grow light that I set my luffa seedlings under before I transferred them to a south-facing windowsill:
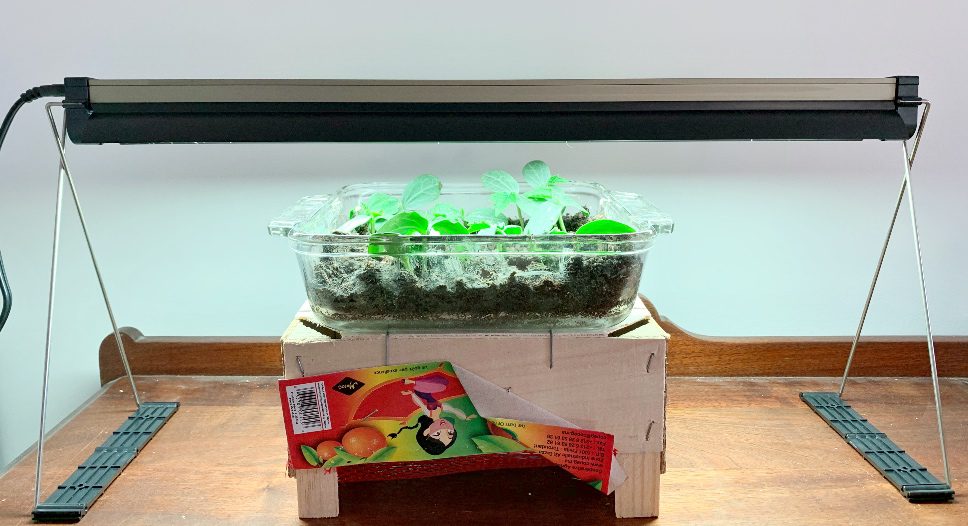
2. Find somewhere for the luffa to climb
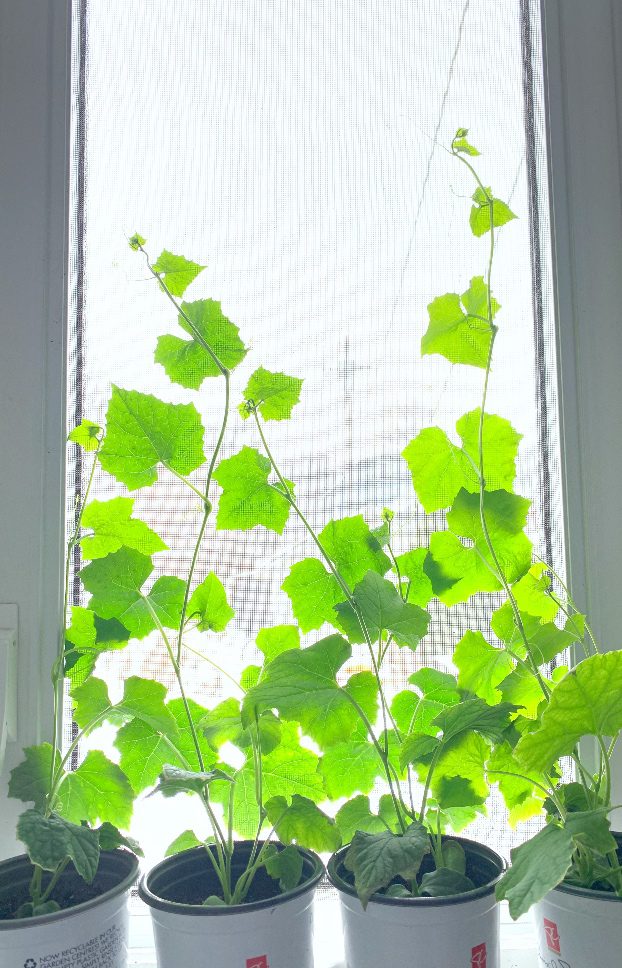
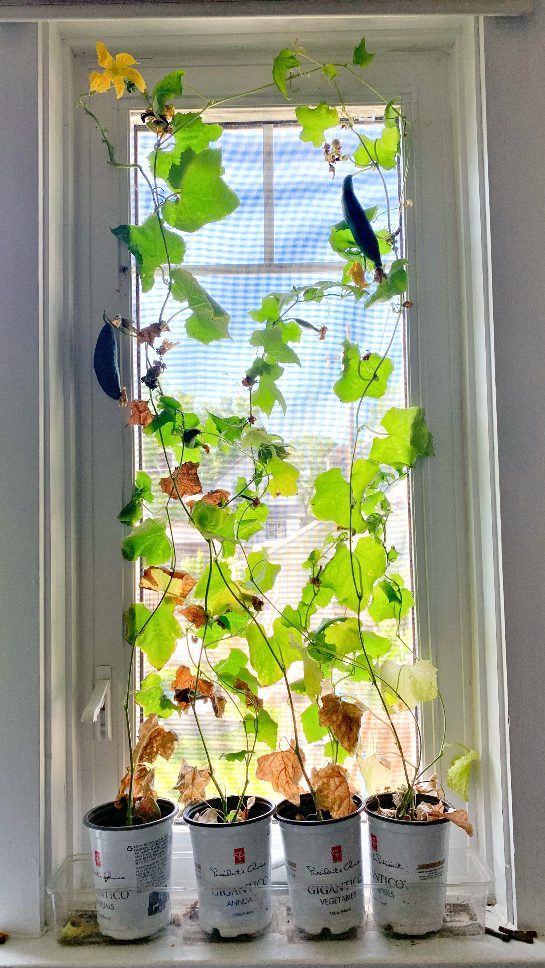
Now that our luffa plant has germinated, it will grow quickly and fast outgrow the space under our grow light. I am very lucky in my home to have a tall south-facing window, so once my seedlings outgrow my grow light, I transfer them over to the windowsill. In the future, I will also experiment with putting seedlings in a greenhouse.
The luffa sponges were happy there and attached themselves to my window screen. Eventually, they grew so tall that they got taller than the window and fell back on themselves. In the future, I would attach a string to the pot for the vine to climb up. It would also be much easier to transfer outdoors that way.
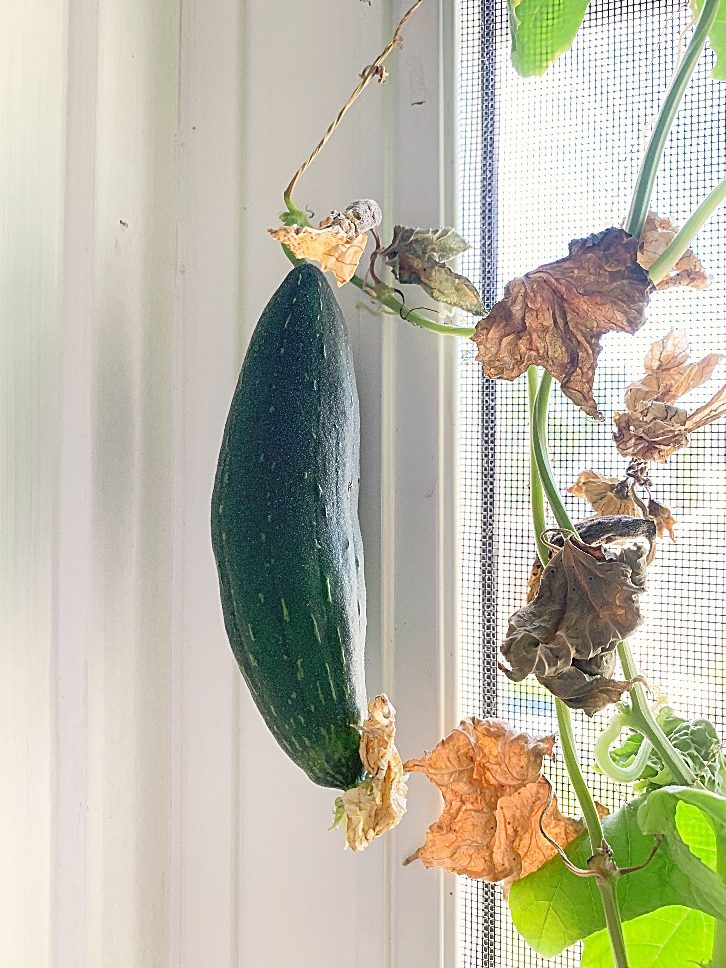
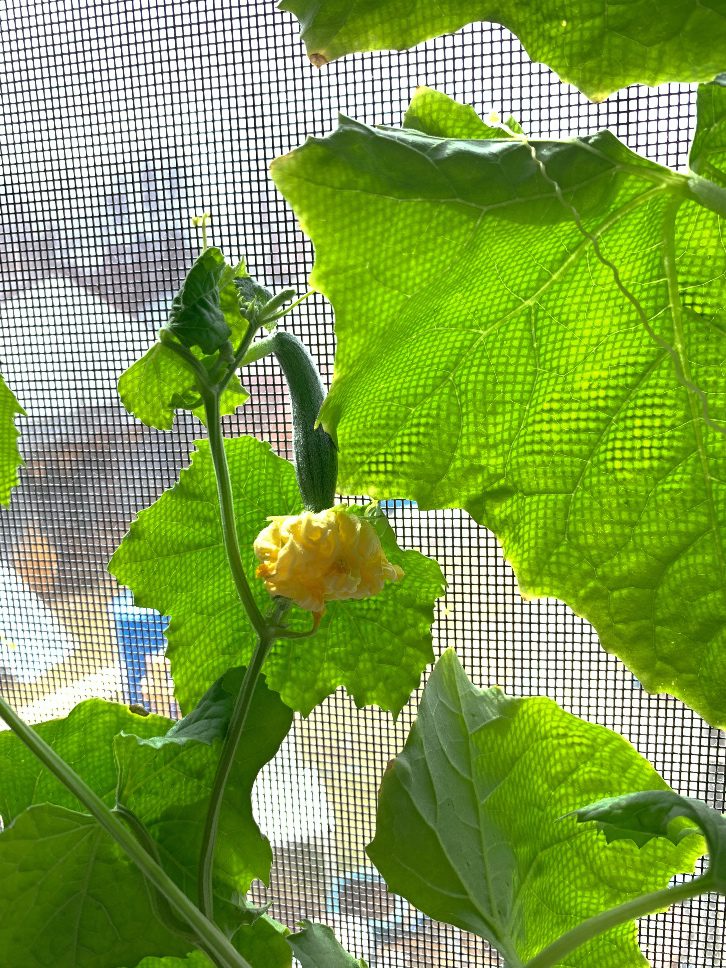
To my great surprise, the luffa plants started flowering indoors! I wasn’t sure if I had to pollinate them or not, but since I was very pregnant and tired, I kept forgetting to pollinate them. Fortunately, I discovered by accident that they are indeed self-pollinating, and I started getting a baby luffa!
*insert happy dance*
At this point, I started to doubt the wisdom of when I started my plants, but as you’ll see by the time you read the rest of this blog post, it was still the right choice.
3. Wait until the nightly temperature is warm enough
If you remember earlier, I told you that luffa sponges couldn’t survive in temperatures colder than 10 degrees Celsius. Hugely problematic when you live somewhere cold. Even though freezing temperatures stop at the end of May, it does not get consistently warm enough at night until the middle of July. (This is written about the summer of 2020, and our June was a lot colder than normal.)
I tried to experiment with wrapping up my vines and providing protection for them, but they were too big, and it just didn’t work. Well, it worked for a while until we had a surprise night of -5 degrees Celsius temperatures.
They were toast. But it was okay because I was sacrificing these plants in the name of science!
Anyway, the most effective way to harden off my luffa plants was to open the window they were growing on, leave it open during the day, then close it at night. When it was finally time to transfer them outdoors, they didn’t go into shock for too long.
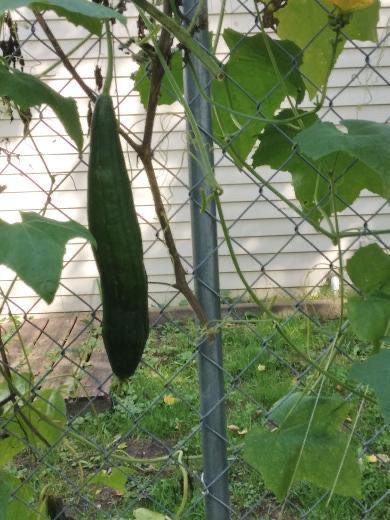
4. Transfer the vine outdoors
When the nighttime temperatures are consistently above 10 degrees Celsius, you can finally transfer the luffa outdoors. Save the warmest spot in your yard, and ensure the vine has a lot of space to climb. While it won’t get as insane as it does in warmer zones, mine still grew to around 10 feet during a colder-than-normal summer.
If at any point there is a risk of frost, pick your luffa sponges. If they get frost, they will be ruined and/or discoloured, and all your hard work will be for nothing. Don’t worry if they are green; you can dry them indoors.
As a side note, I also found that any flowers that were on the vine immediately fell off when I set them outdoors. Once the plant had established itself again, flowers continued to bloom.
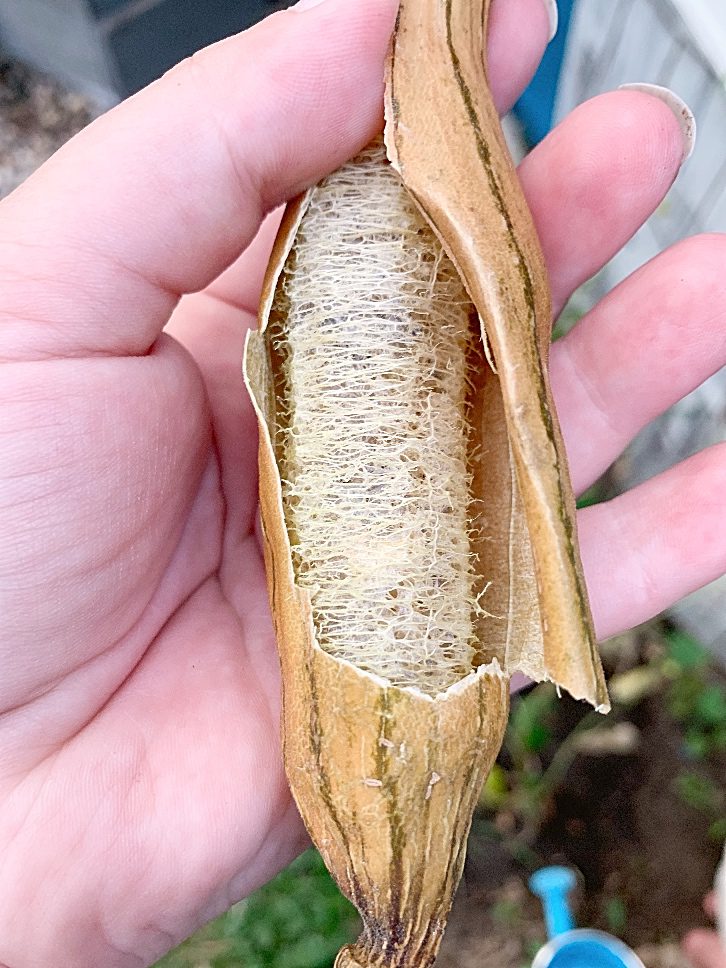
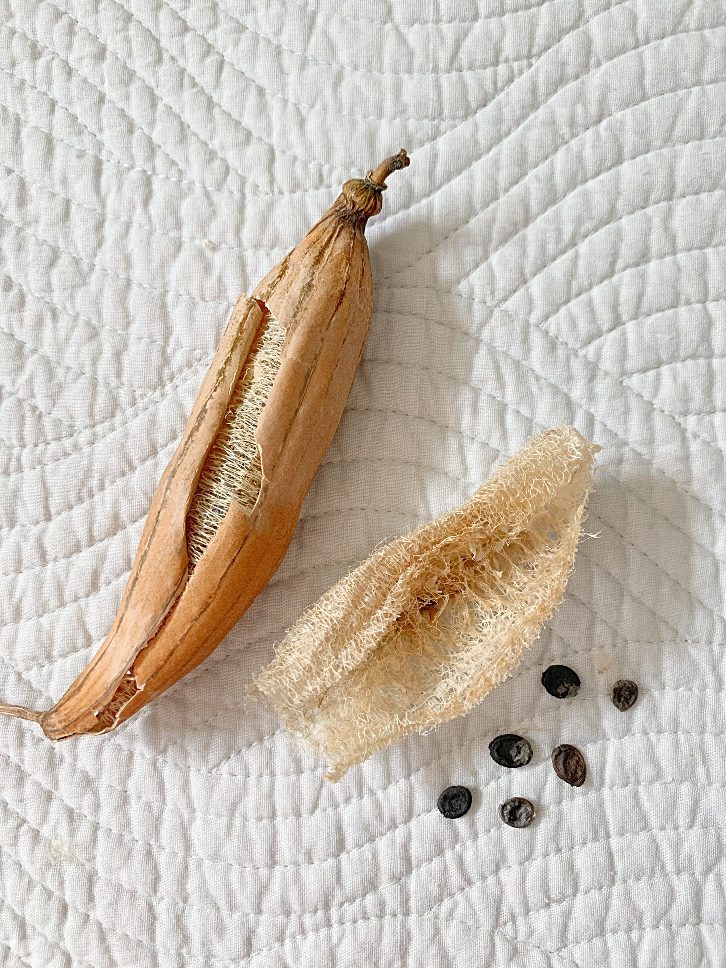
Mature Luffa Sponges
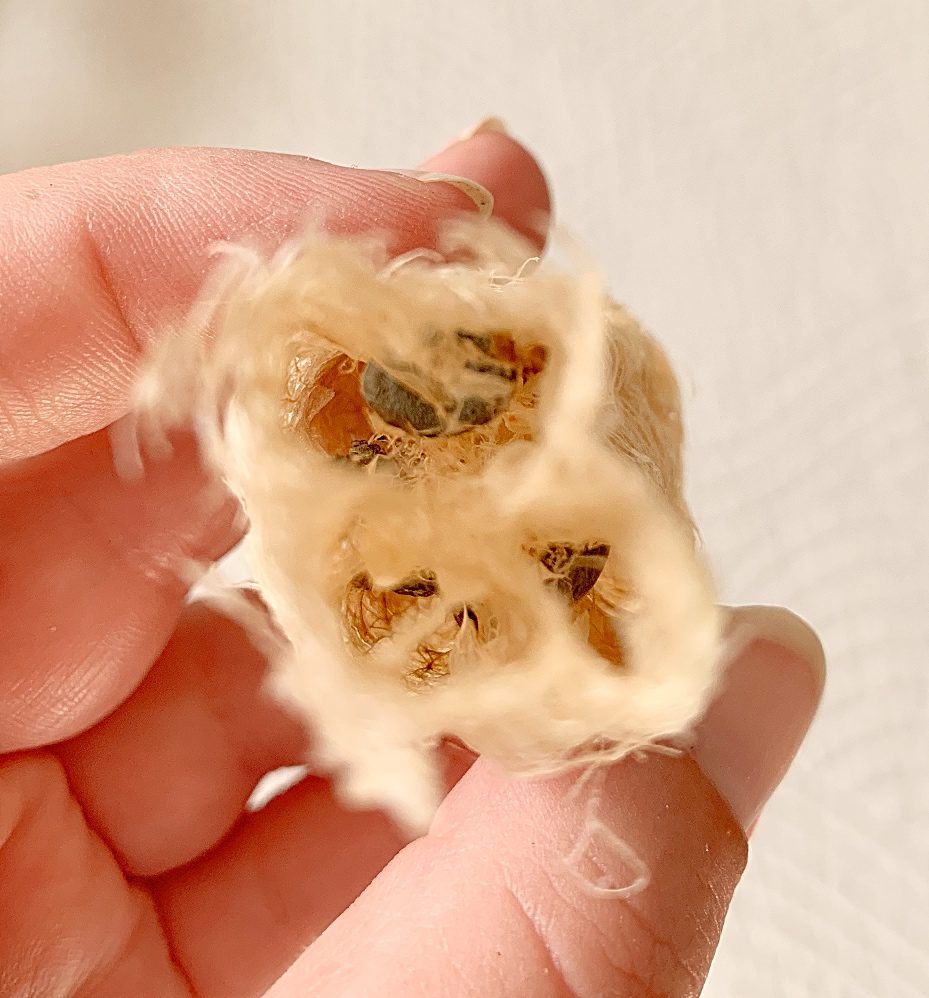
Once my little sponges were tan-coloured, totally dry, and rattled inside, I knew they were ready. Mine were much smaller than I expected them to be, and I have a feeling that if I had left them indoors and not tried to transfer them outside, they would have gotten larger.
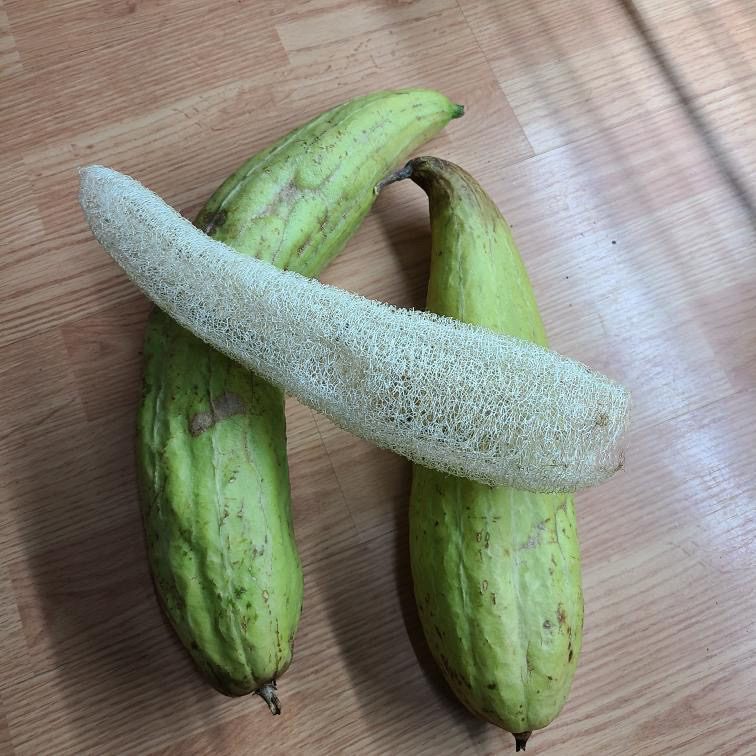
Ideally, you pick them at this stage, but if frost came when they were still green, I’d still pick them and dry them indoors.
What I’d Do Differently
So, in a perfect world, I would actually grow luffa plants in a greenhouse or high tunnel and keep them there the whole summer. I think they would be much happier, and I’d get much larger fruit from them. As you’ll see in my pictures, my best luffa sponge was only the size of my hand. Not like those huge ones that literally everyone else on the internet who grows them gets.
Check out these photos of success from one of my readers in Zone 6 for reference:
Now that I know I’ll be growing my luffas indoors for a good chunk of their lives, I’ll start them in newsprint pots and transfer them to a larger pot indoors. In fact, I’d love to experiment with growing one vine entirely indoors and never transferring it outdoors.
Even though the vine gets crazy indoors, I would stick to the same planting schedule as I did in 2020. Anyone I know in the same zone as me that started their sponge 6-8 weeks before the last frost date and put their plant out at the same time as all their other plants did not get any sponges.
Where do you get the seeds?
In 2020, I purchased my seeds from the Ontario Seed Company. If you have a locally owned garden centre, ask them if they could bring them in for you. Most owners will be happy to bring in items they know their customers want.
Since I had 2 of my 3 sponges grow completely to maturity, I actually saved a few of my own seeds to grow in 2021, but they did not work at all! Since the germination rate can be poor, I would always order a seed packet, just in case. These black seeds will likely germinate, but anything that’s lighter-coloured will likely not.
2025 Update on Luffa Growing
The post above was last updated in 2021, and I haven’t tried growing luffa sponges again… Until now!
This year, I bought my seeds from a different company—one that claimed the days to maturity were only about 100. I’m a little skeptical of that number. Maybe that’s just until the first fruit sets? I guess we’ll see!
Even so, I didn’t take any chances and started my seeds in February, just like in previous years.
I used newsprint pots I made by wrapping paper around a large jar—roughly the same size as the containers in the photos above. Once the vines were long enough to start twining, I transplanted all three seedlings into a single large pot. Right now, that pot is sitting in front of my south-facing window. Each plant has a bamboo stake, and the vines are happily wrapping around them.
Looking at my forecast this year, I’m hoping to transfer them outside in the middle of June. I have the hottest spot in my yard picked out and set aside for them, so wish me luck!
If you liked this blog post, find me on Facebook, TikTok, and Instagram to follow more of my farmer florist journey and join in the cut flower conversation! I also make weekly videos on my YouTube channel. You can also sign up for bouquet-making events and buy my flowers at my sister site Shifting Blooms. I hope to see you there!
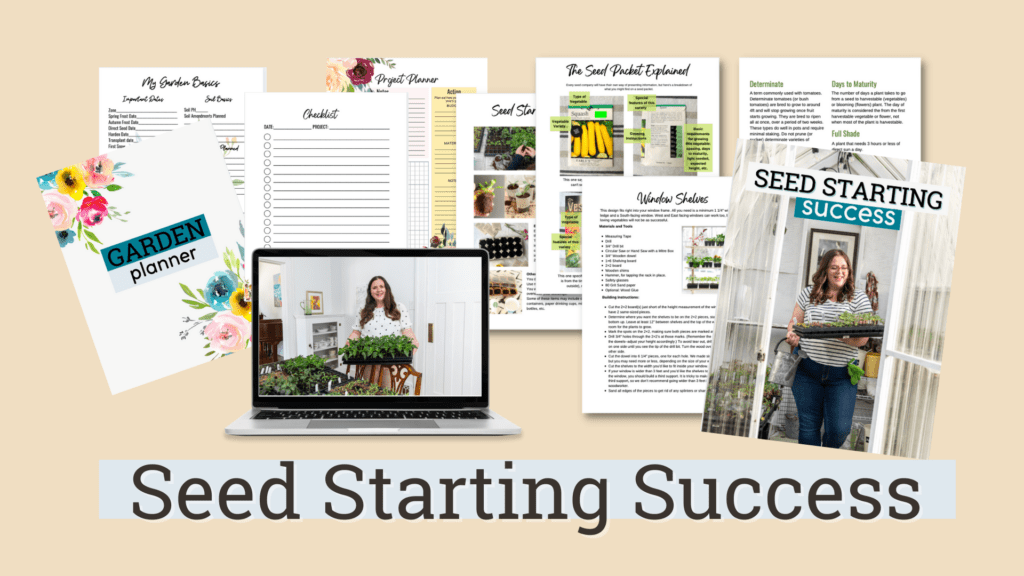
HAVE YOU TRIED SEED STARTING, ONLY TO BE LEFT WITH STRETCHED-OUT SEEDLINGS AND DEAD PLANTS?
You’re not a bad gardener–you just need a little know-how. For the price of a few seed packets, you can stop wasting time and money and start growing seedlings that actually live and you get to harvest. Don’t miss out on another growing season. Get your copy of Seed Starting Success now!


Andrea
Negrecia D'Souza
Kristen Raney
Connie
Kristen Raney
CD Greier
Kadri
Kristen Raney
Robyn
Terry
K
Michael Dun
Dawna
Treasure Curry
Mel
Jessica
Georgie
Jack
Debbie Lund
Nicole
Edna
Fayemarie Carter
David Innes
V mt
ImaLima
Tea
Casey
Pamela
Pamela
Oscar
Mary Orr
Mary Orr
Ran-Lee Rhinas
Darlene