
Have you always wanted to grow anemones or ranunculus, but you’ve been scared of how much work it takes? The nice thing about growing these flowers is that the process for both is exactly the same. That means you can start them at the same time, and they will most likely bloom at the same time, too!
If you’re new to growing cut flowers, or you’re an experienced flower farmer new to the soaking and pre-sprouting process required to grow ranunculus and anemones, this one’s for you!
In this post, we’ll go over what to look for at the different stages of an anemone’s growing process, including step-by-step instructions on soaking and pre-sprouting with photos of the various stages along the way.

If you’d rather watch than read, check out this video on my YouTube channel:
When should I start my anemone corms?
The first week of March is the perfect time to start your ranunculus and anemone corms if you have a last frost date of approximately May 21st. I’m gardening in Zone 3 (on the Saskatchewan prairies) and have found that early March is the best time to start these beautiful flowers to ensure the most success.
Unfortunately, you can’t plant anemone corms directly into the dirt, even if you’re seed starting. You have to do a little bit of work first!
How long should I soak my corms?
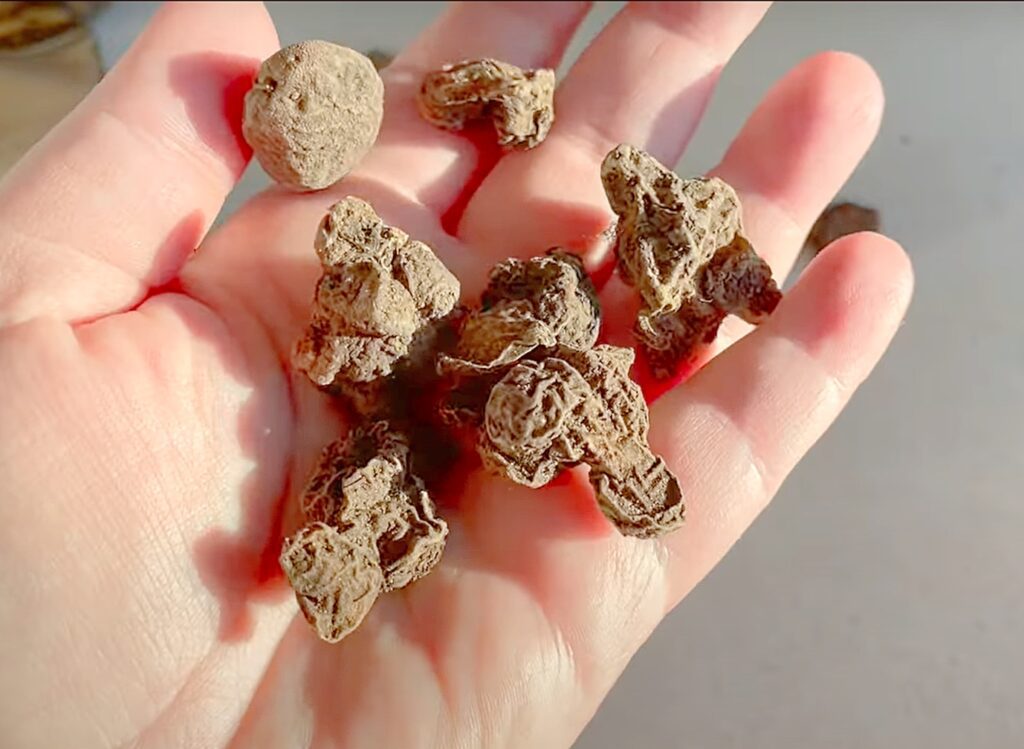
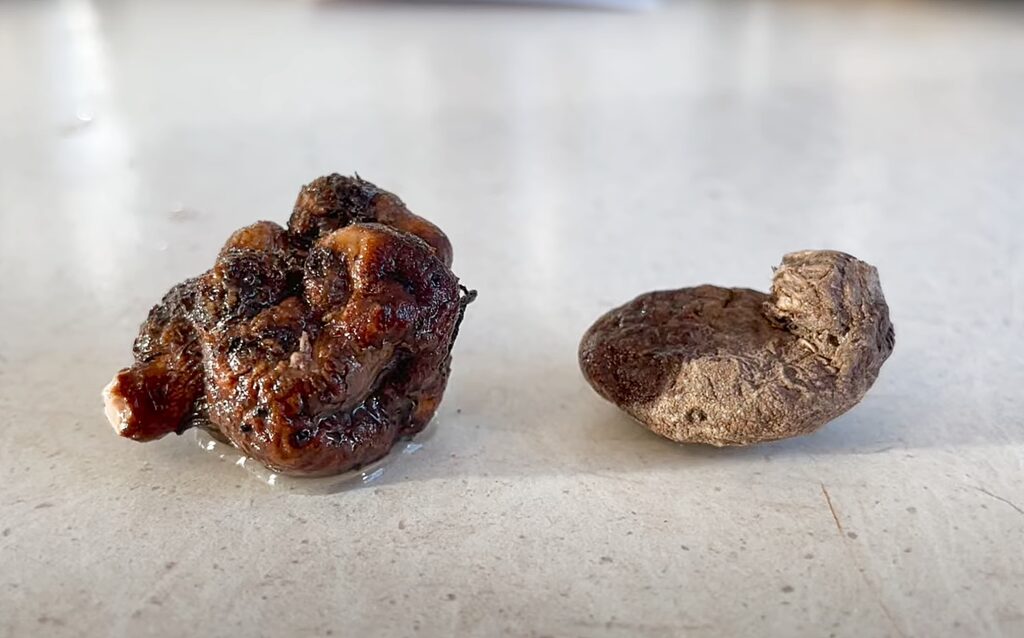
To soak your anemone or ranunculus corms, place them in a container of water for 4-6 hours or overnight. Depending on your particular circumstances, one of these methods might suit you better than the other. I prefer to place my corms in water before bed, let them soak overnight, and then deal with them in the morning after the kids have all left the house.
Related: How to Grow Ranunculus in Zone 3 (So They Don’t Die!)
[convertkit form=1920738]
How to pre-sprout anemone corms
Now that you’ve soaked your corms overnight (or for 4-6 hours), it’s time to take them and put them in a tray so you can start the pre-sprouting stage!
A lot of people have asked me if it’s necessary to pre-sprout. My answer is no, but you might get better results. It’s entirely up to you. If you have a cool, dark location in your house to pre-sprout your anemones and ranunculus, fantastic! If not, you can still grow these flowers with great success! Just put the soaked corms in the soil, pop the tray under grow lights, and do the best you can.
This year, I made a couple of small changes to my pre-sprouting process. For previous year’s successions, I pre-sprouted my corms in a flat tray and then transferred them into a seedling tray afterward. I found the extra energy and time it took to stuff the pre-sprouted roots into the tiny cells unnecessary, so I decided to plant them directly into the seedling tray this year.
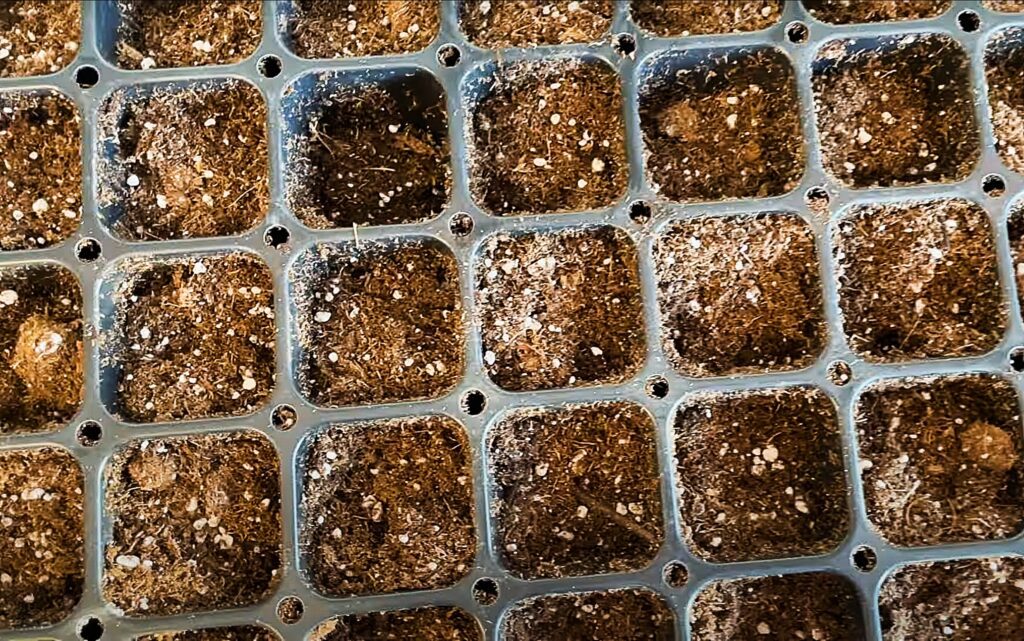
To begin the pre-sprouting process, fill your tray approximately halfway with soil. I just use a general potting soil, but you can use coconut coir, peat moss, or whatever you have available that is appropriate for seed starting. Next, cover the corms with soil and place the trays in a cool, dark place.
After approximately two weeks, they should look like this:
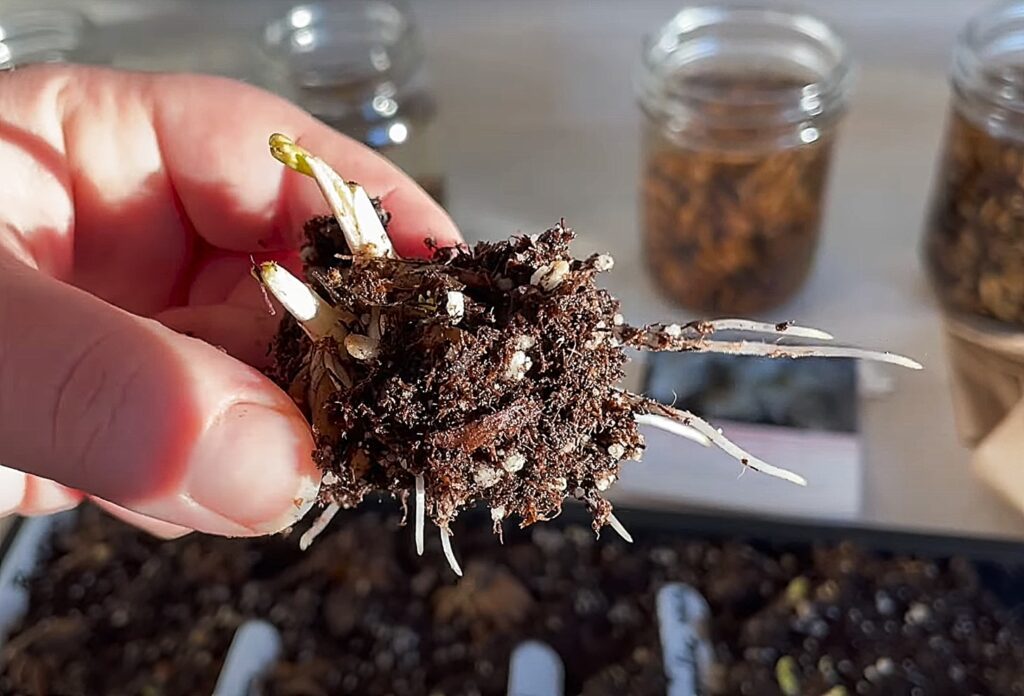
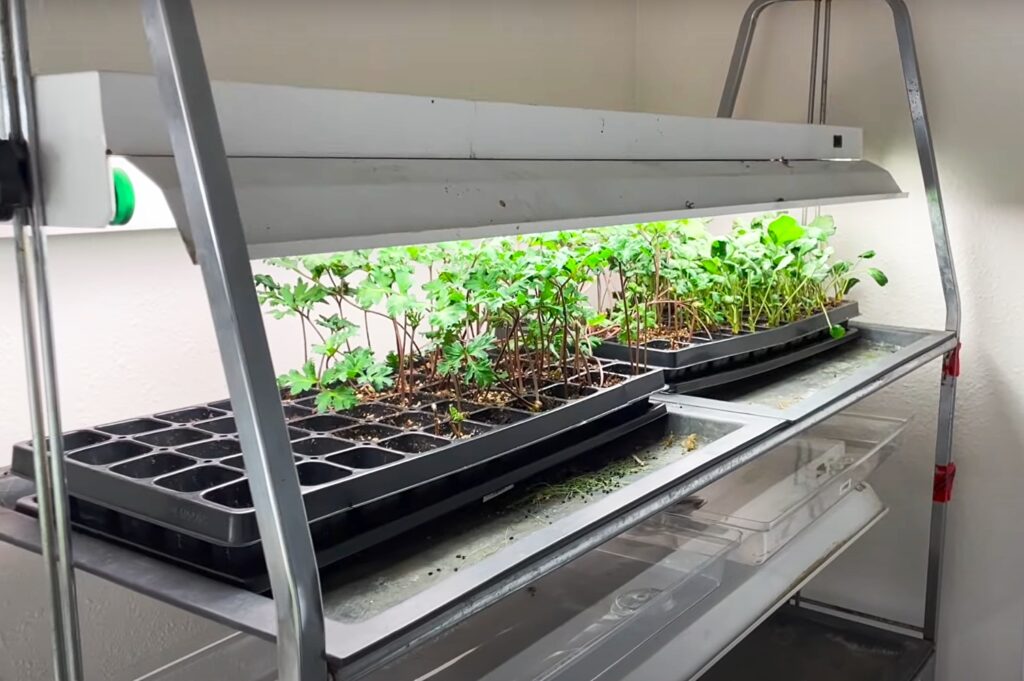
Now your ranunculus and anemones are ready to go under the grow lights!
I was able to start a succession of ranunculus and anemones this February in preparation for a wedding I am doing flowers for on May 7th. About a month after soaking and pre-sprouting my corms, they now look like this:
Growing anemones and ranunculus isn’t super difficult, but it does require a few extra steps that some beginner gardeners might not want to do. So, if you’re not up for the challenge this year, don’t worry about it! You might be ready next year or the year after that!

If you liked this blog post, find me on Facebook, TikTok, and Instagram for more cold-climate vegetable gardening tips, delicious recipes, and cut flower goodness! I also make weekly videos over on my YouTube channel. I hope to see you there!
READY TO GROW YOUR OWN BEAUTIFUL CUT FLOWER GARDEN WITHOUT THE HASSLE?
I’ve taken all the guesswork out of creating a cut flower garden with my e-book, Cut Flowers Made Simple. It’s the perfect way for beginner and intermediate gardeners to start their own cut flower garden with or without seed starting.
Finally, you can create a stunning cut flower garden with everything you need to make beautiful bouquets all summer long.


Suzanne
Lori Ceaser
Benedette Long
Jana Sifuentes
Alysha
Laura
Daniella